
Advanced Product OptionsUsing the app
Create an option set
Steps:
- From the app’s menu on the left select Option Sets and on the page that opens click the Create Option Set button
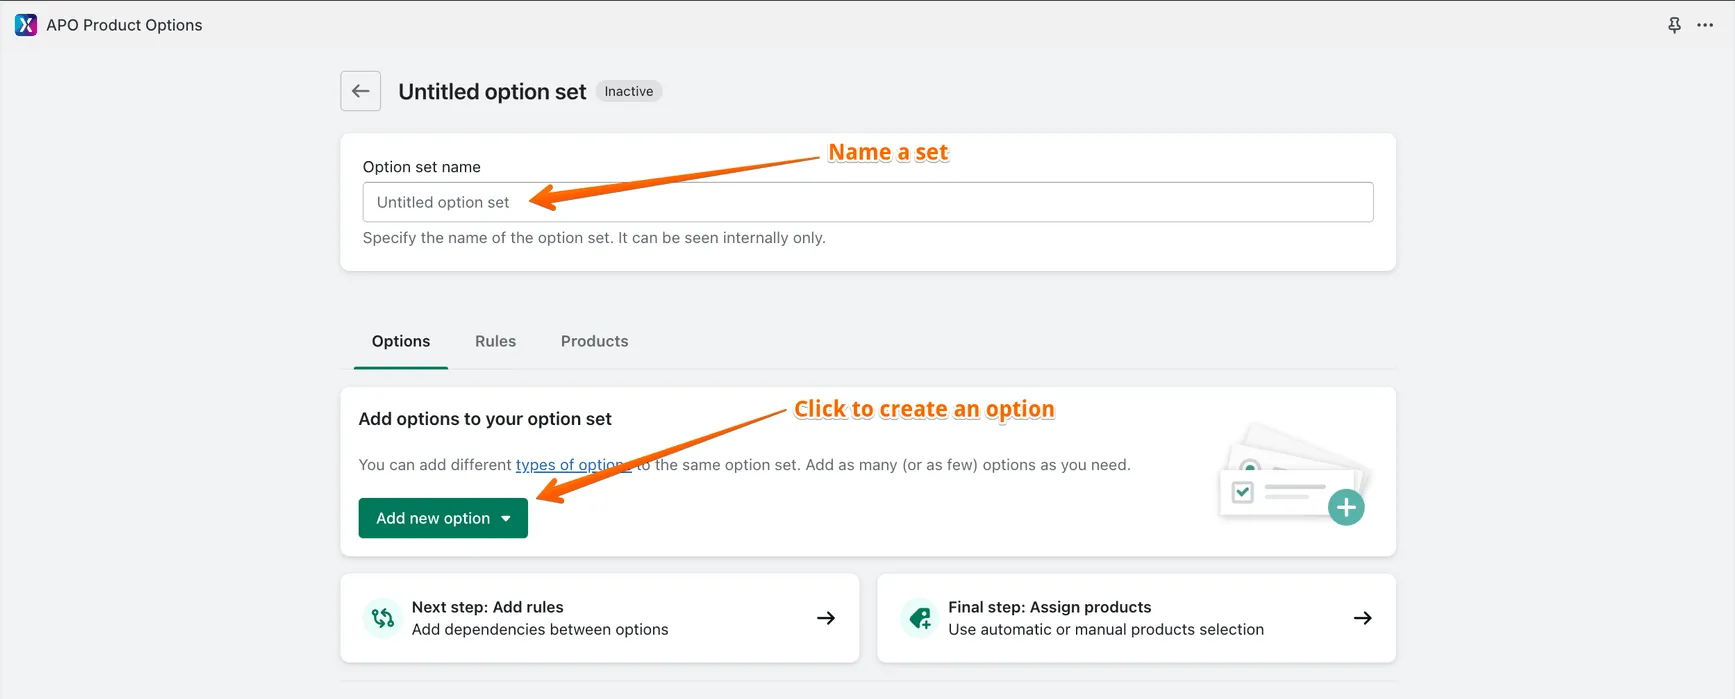
- In the Option set name field, provide a name for your set. This is for your records only, it will not show up on the front end of your store
- Underneath, in the tab called Options you will create the options and values for your option set. To start, click the Add new option button
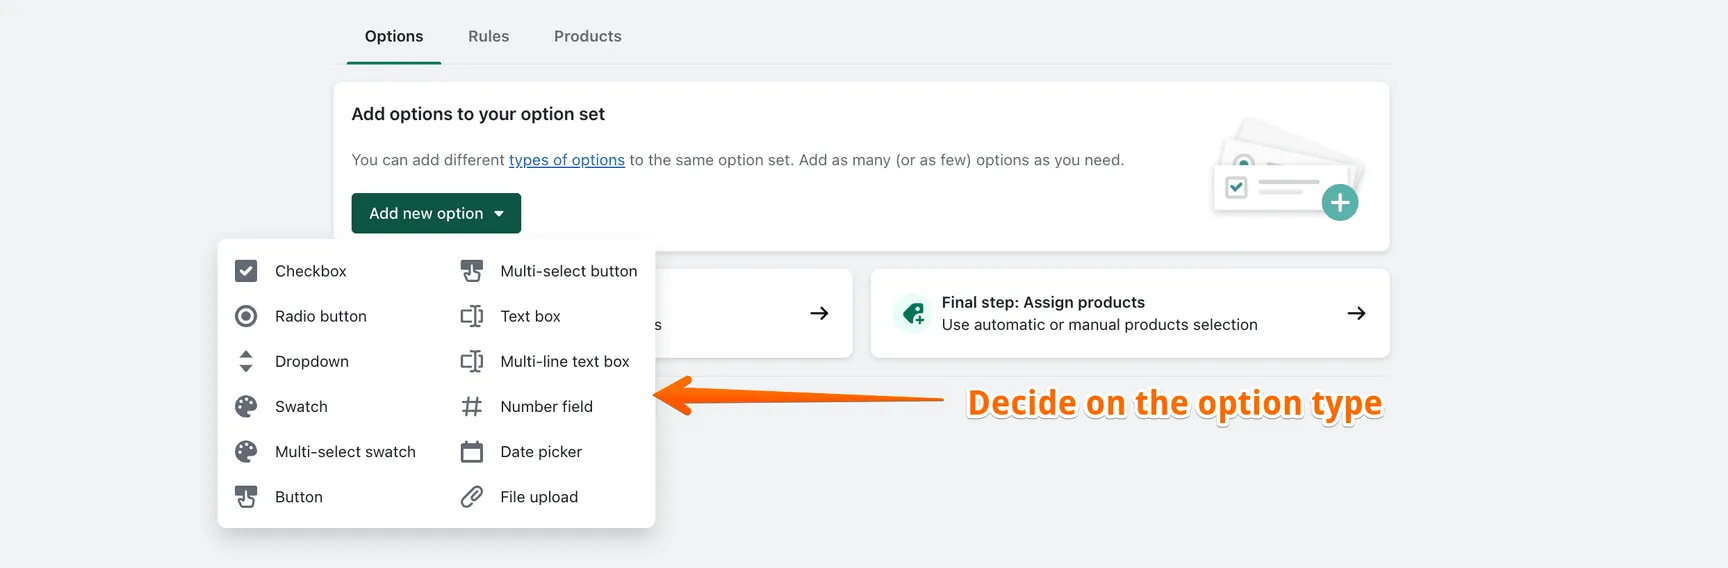
- From the popup that appears, you’ll need to select the type of the option you want to create. For the argument’s sake, let’s assume you choose the Swatch option type
- You’ll need to provide a title for your option in the Option title field. It will show on your product page above the option values. So if you’re adding a color swatch, you can name it simply “Color”
- Optional: Select the Option is required checkbox only if you can’t allow shoppers to purchase your product without selecting from this option. For example, they can’t buy a
t-shirt without selecting a size, in which case you would select Option is required

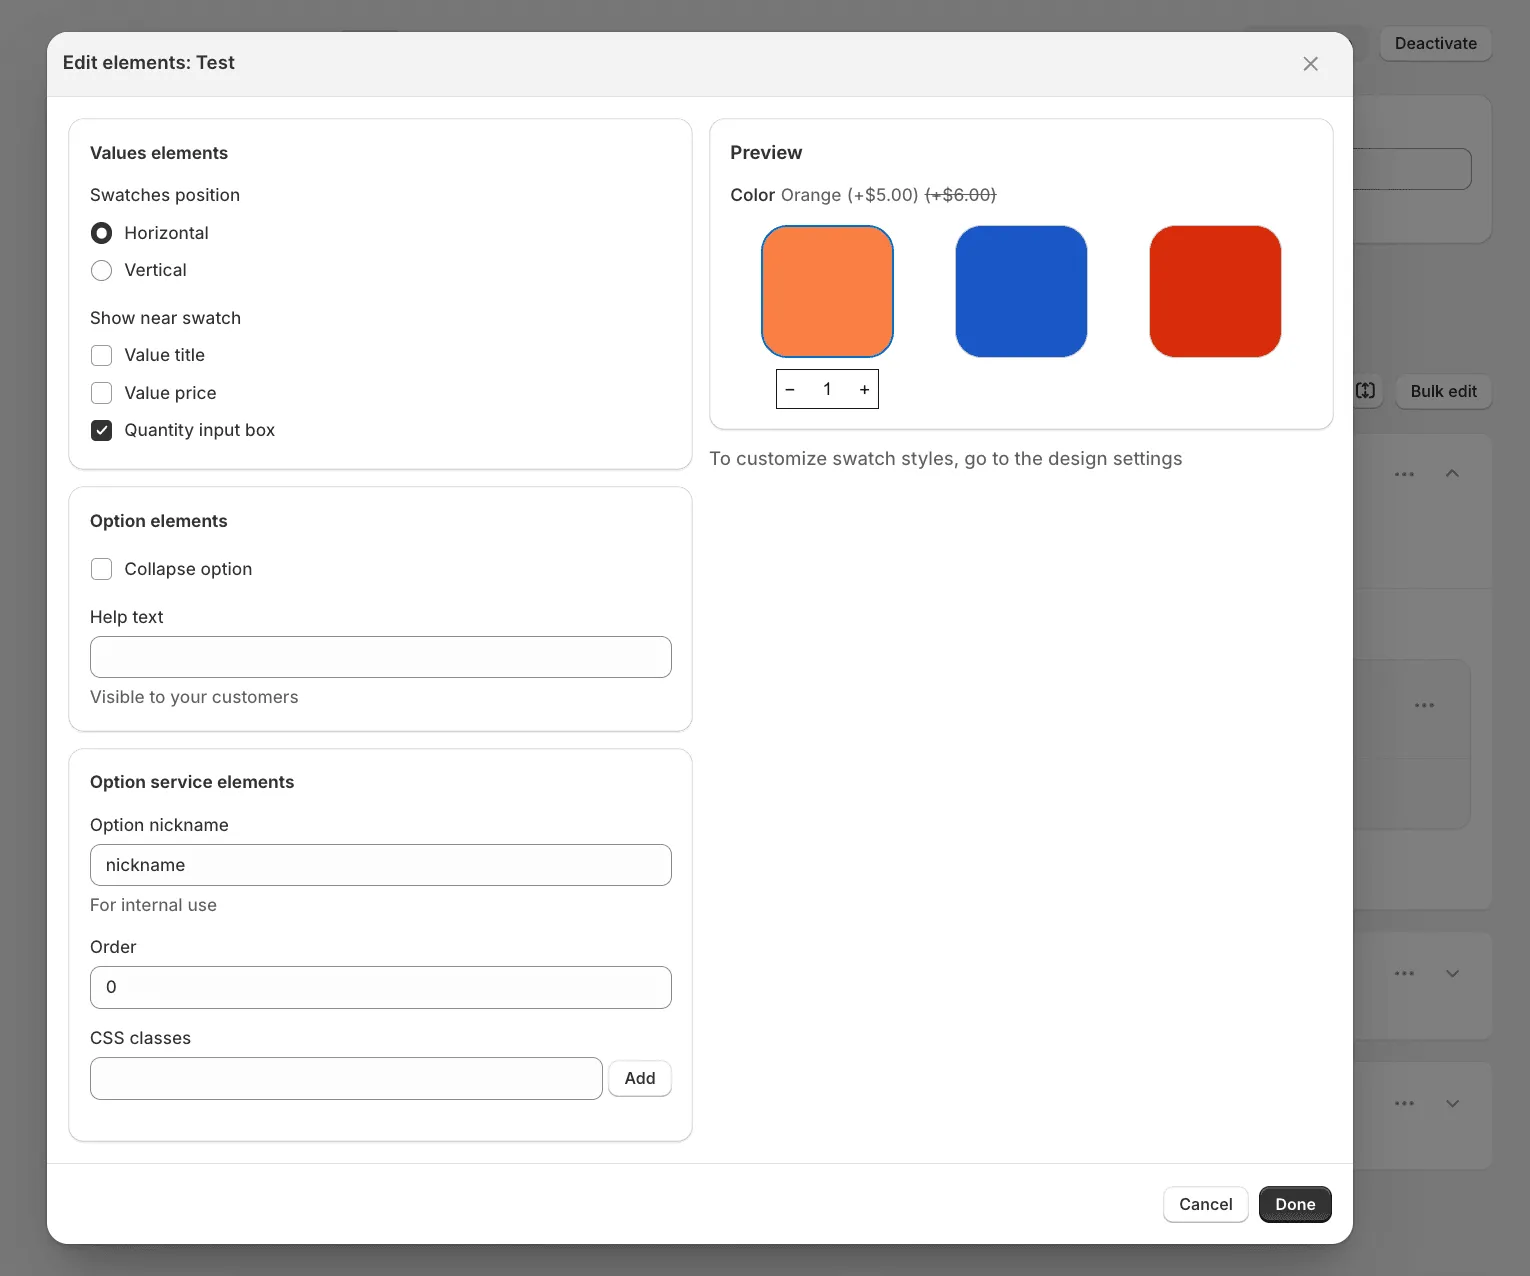
- Optional: Below the Option Title, you’ll find the “Edit Elements” section, which allows you to customize the display of option values.
1. Values Elements (Available for “Swatch”-Type Options Only)
For options using the Swatch type, you can adjust the following settings:
-
Swatches Position – Choose whether swatches are displayed horizontally or vertically.
-
Show Near Swatch – Enable additional elements to appear next to swatches:
- Value Title – Display the name of each swatch.
- Value Price – Show the price associated with each swatch value.
- Quantity Input Box – Allow customers to specify the quantity for each swatch selection.
- The Option Elements section provides additional settings to refine how options are displayed on the product page.
- Collapse Option – Enables the option values to be collapsed by default, keeping the page layout more compact. Customers can reveal the option values by clicking on the collapsible menu. If this setting is activated, you can specify whether the option should be expanded or collapsed by default.
- Help Text – Allows you to add a descriptive note or instructions for the option, which can assist customers in making informed selections.
- Show Calendar Icon and Show Next Available Date (Date picker options only) – Add a calendar icon to the date field and show the earliest date customers can pick under it. Learn more in Date picker: available and blocked dates.
- The Option Service Elements section includes settings that help manage option organization, styling, and internal references.
- Option Nickname – A label for internal use only; customers will not see this. It helps store owners and developers keep track of options more easily.
- Order – Defines the position of the option relative to others on the product page. A lower number places the option higher in the list.
- CSS Classes – An advanced setting that allows developers to assign specific CSS classes to the option section, enabling custom styling and layout adjustments.
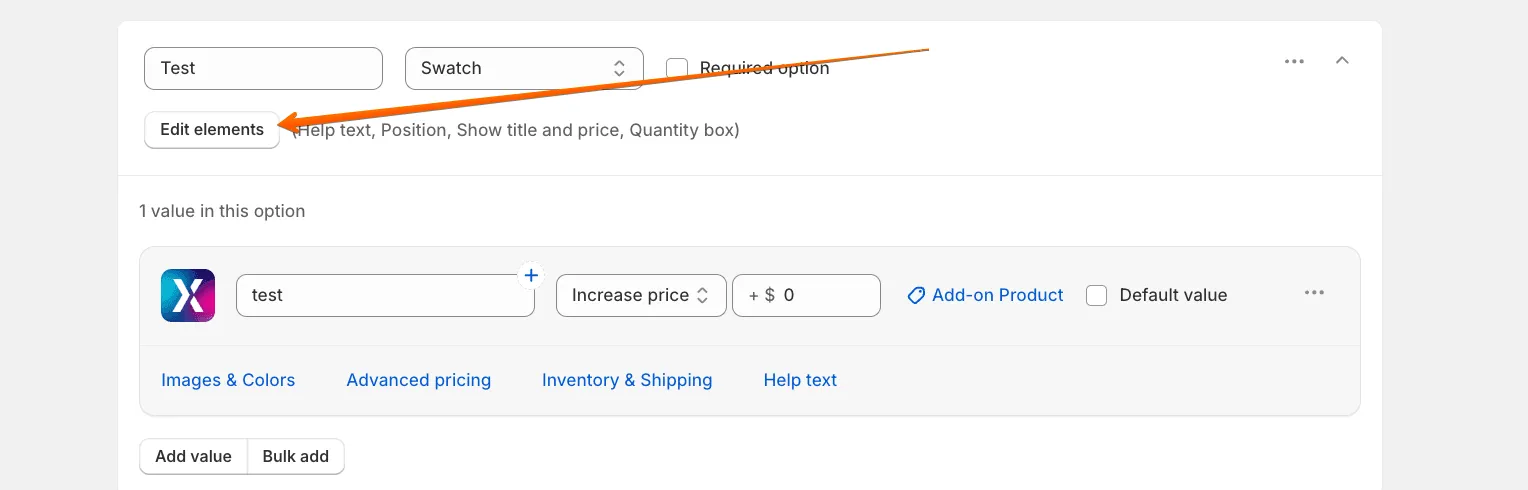
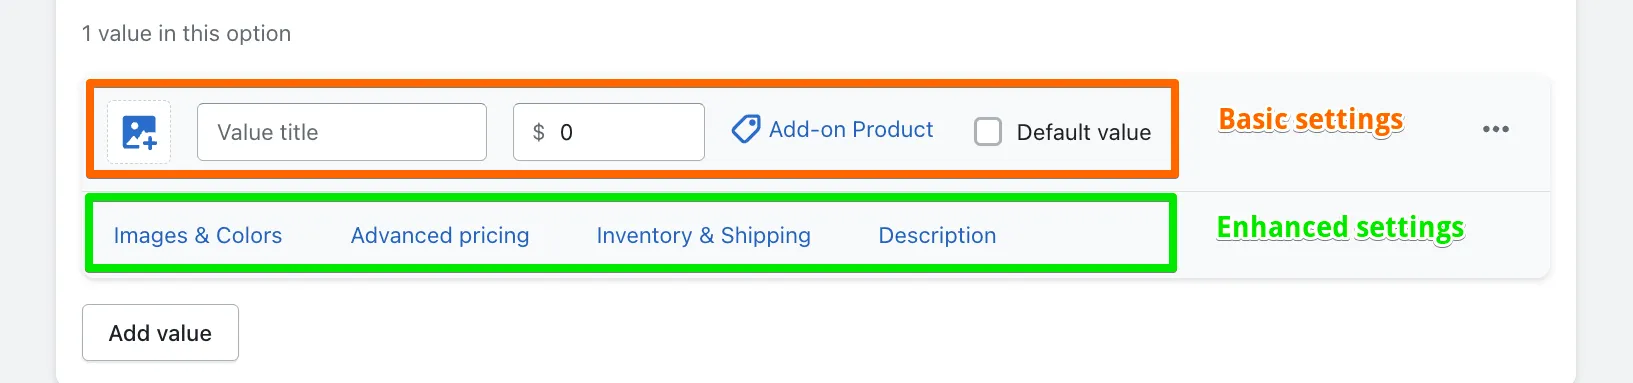
- Now you need to add values to your option. The first value is pre-created by default. The basic settings are available in the general view, the enhanced settings are grouped and placed in the corresponding tabs.
Basic settings
Section titled “Basic settings”- Fill in the Value title field - it will show on the front end for some option types (by default it is hidden for Swatches).
- Upload a picture by clicking the image icon. Since we are creating Swatches, the image will be used as a swatch by default.
- Insert a price value into the price field next to the value title. You can use both positive and negative prices depending on your needs. The price of an option value will be added to (+$)/subtracted from (-$) the original product price upon selection.
- Add-on product - this setting allows you to link option values to existing products/variants from your catalog. The linked product will be retrieved from the Shopify backend and added to the order as a separate line item.
- If you select the checkbox called Default value, this value will be pre-selected when the product page is loaded.\

Enhanced settings
Section titled “Enhanced settings”Images & Colors
Section titled “Images & Colors”- The image we uploaded earlier in the basic settings section is already available in the tab. It’s set as a swatch icon automatically.
- Enable the Enlarge on hover setting if you want to see this image enlarged when you hover over the swatch on a product page.
- Enable the Replace main image setting to make this image appear as the main product image upon selection.
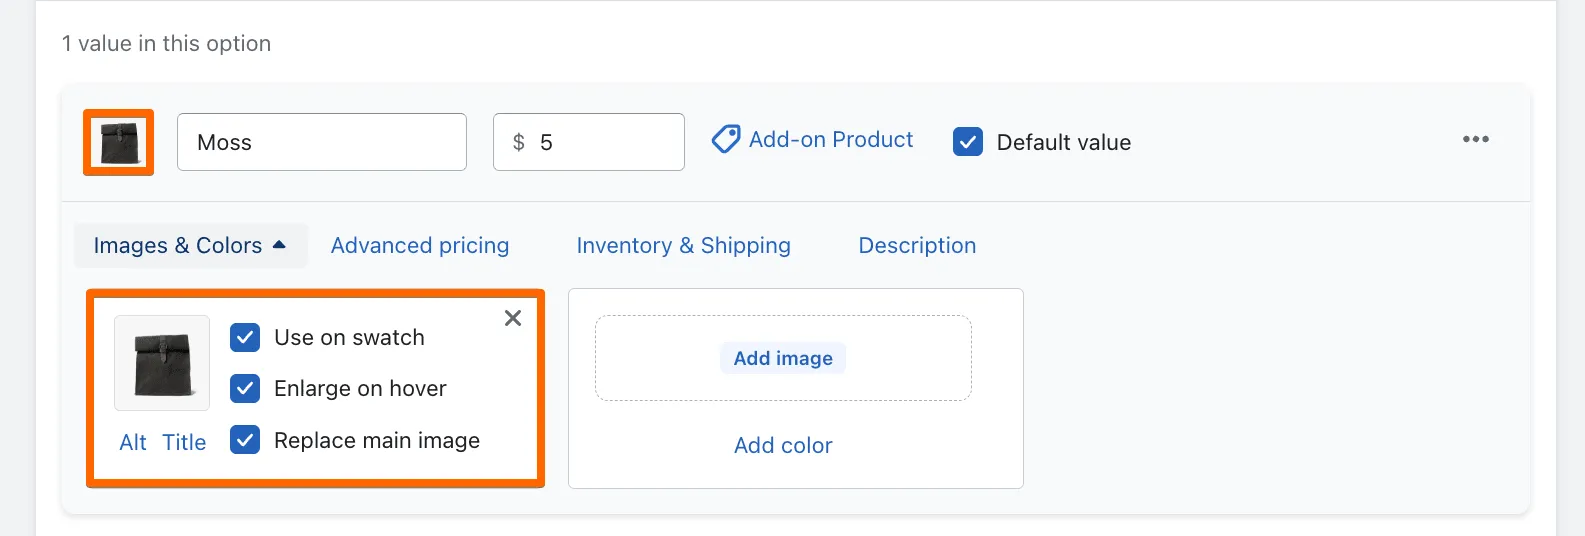
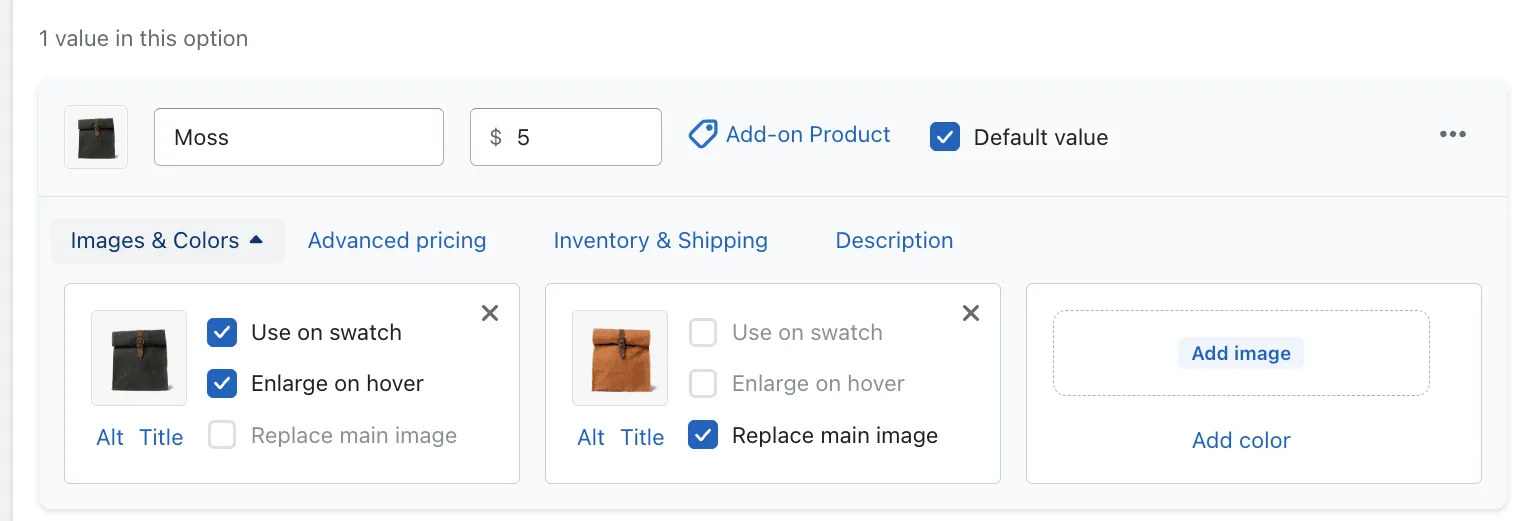
- You can upload an additional image if needed. The Use on swatch, Enlarge on hover, and Replace main image settings can be enabled for one image only.
Advanced pricing
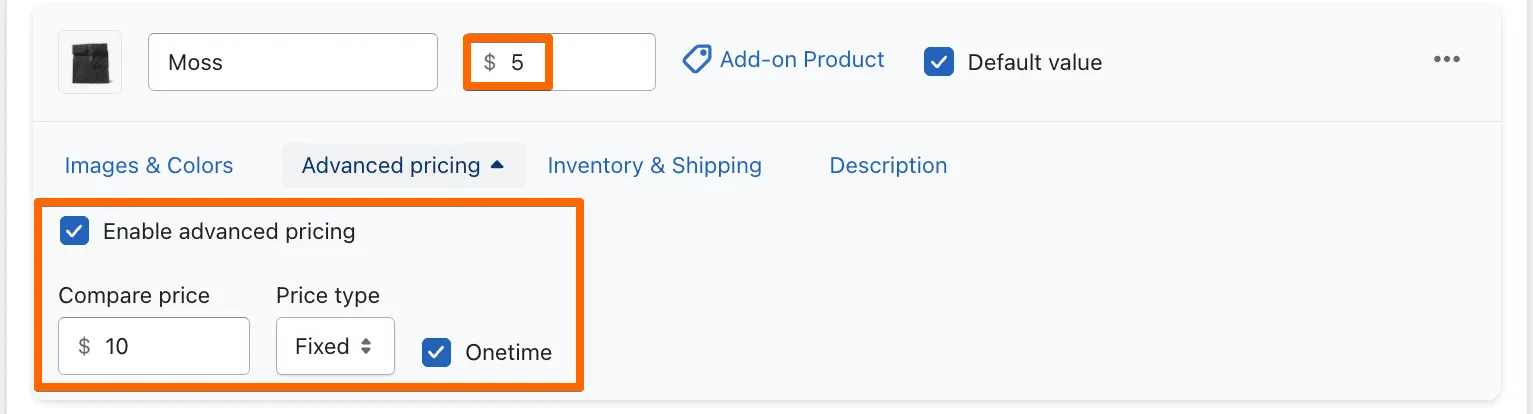
Section titled “Advanced pricing”- The price we added in the basic settings is the main value’s price, this makes the Enable advanced pricing checkbox preselected by default.
- You can add “Compare price” if you run some sales (compare price will be crossed out).
- Select the “Price type” (Fixed/Percent). Keep in mind that if you select the “Percent” type, the percentage will be calculated off the original product price.
- Make the option value “Onetime”. If the Onetime option is selected, the custom price will be added only once despite the quantity of the products added to the cart
Inventory & Shipping
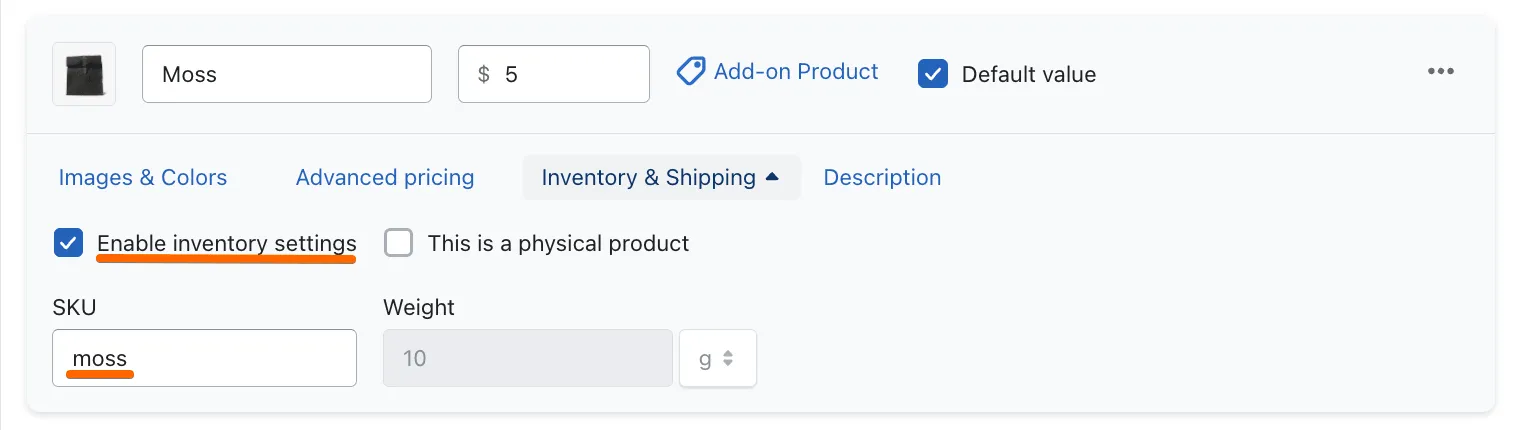
Section titled “Inventory & Shipping”You can assign an SKU attribute to the option value, it will be appended (added) the master product SKU upon selection. To do that:
- Activate the Enable inventory settings checkbox
- Insert an SKU attribute into the SKU field
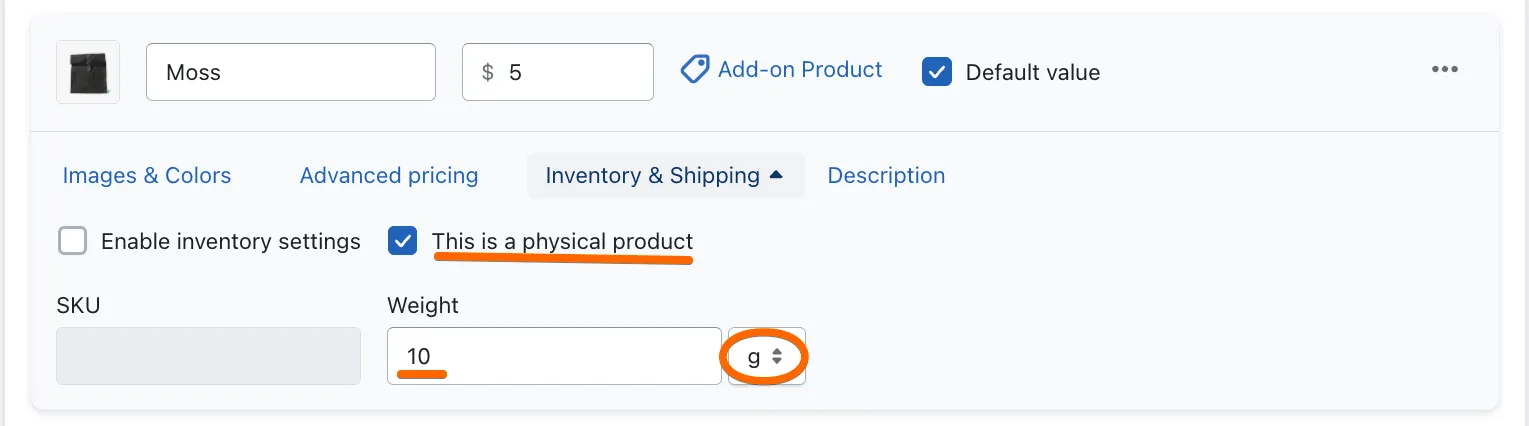
You can assign a weight attribute to the option value, it will be added to the weight of master product upon selection. To do that:
- Activate the This is a physical product checkbox
- Decide on the weight measure (g, kg, oz, lb)
- Insert a weight attribute into the Weight field
Description
Section titled “Description”Add a description to each option value if needed. The description type can be selected in the app Settings admin section.
- Now you would add the remaining values to this option, and then move on to add more options to this option set, if needed.
- We recommend periodically clicking Save at the top right of the screen to preserve you progress.
- Optional: now you can move on to adding rules to your option set
- And, finally, you need to assign this option set to your products.