
Advanced Product OptionsUsing the app
Case 2: Update existing option sets
Use this flow when you already have option sets in APO and want to update them using CSV.
Before you start (important)
Section titled “Before you start (important)”Before editing anything, create a backup of the option sets you plan to update.
A backup allows you to restore everything exactly as it was, including:
- rules and formulas
- display and presentation settings
- translations
- internal option and value parameters
- images and other data not included in CSV export
CSV export does not include all of this data. A backup is the only way to fully roll back changes.
Choose how you want to back up your data
Section titled “Choose how you want to back up your data”Before updating option sets, we strongly recommend creating a backup. You can do this in two different ways, depending on your task.
How updates work (important to understand)
Section titled “How updates work (important to understand)”When an ID is present, the import updates existing data based on cell values.
- Filled cells overwrite existing values
- Empty cells reset the field to its default value
- Data that is not represented by a column in the CSV (for example rules, formulas, or display settings) is not affected
For example, if you clear a value price cell, the price will be reset to the default value (for example 0). This means CSV updates are predictable, but you should only clear cells when you intentionally want to reset a value.
Important: Do not leave completely empty rows anywhere in the CSV, including between filled rows. A fully empty row is treated as an invalid entry and will result in an import error such as “Option Title or Value Title is required.”
Step 1: Export the option sets you want to update
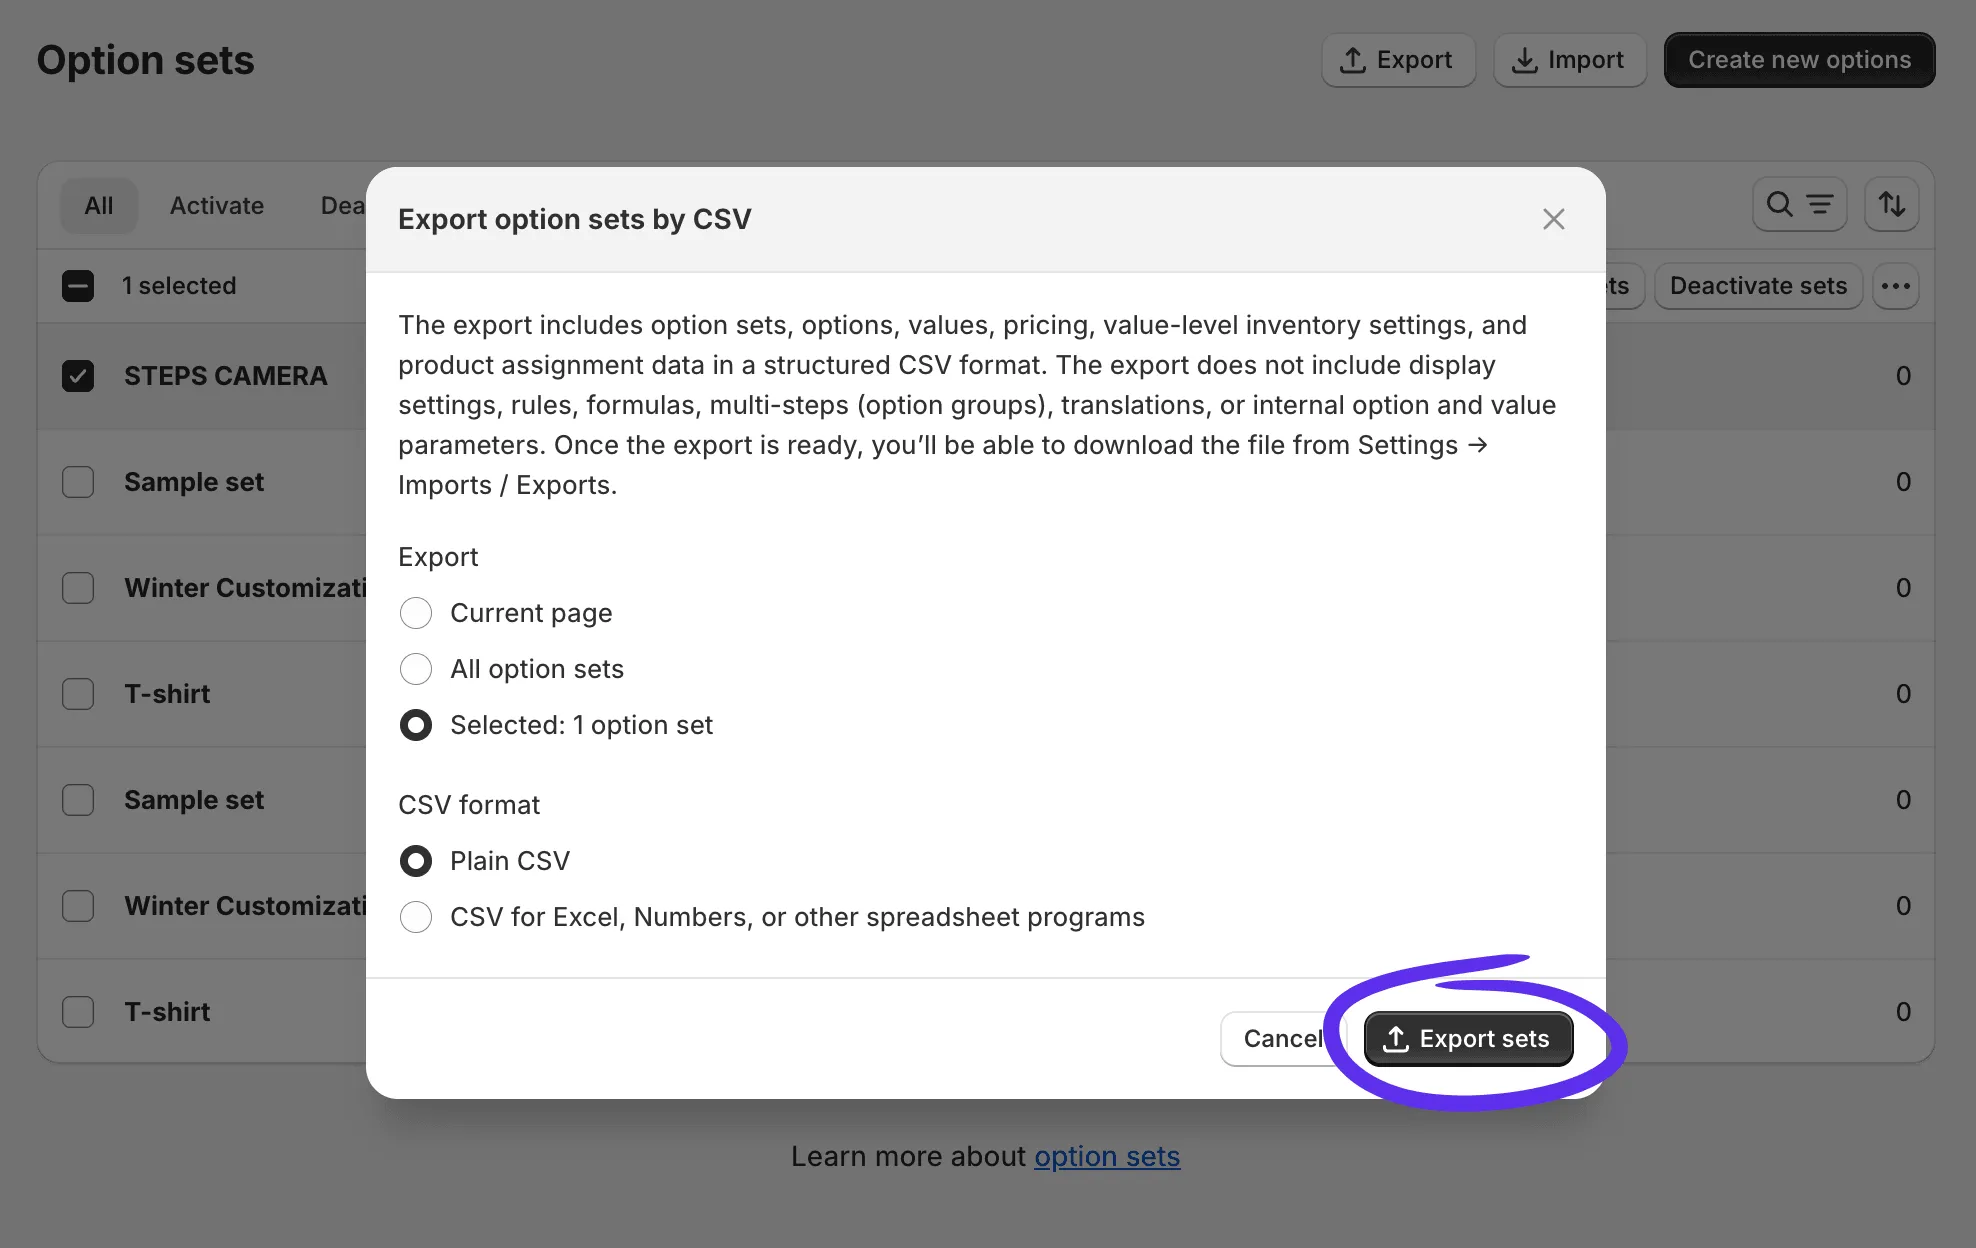
Section titled “Step 1: Export the option sets you want to update”Export only the option sets you plan to modify. Select the option sets in the list, and choose Export sets.
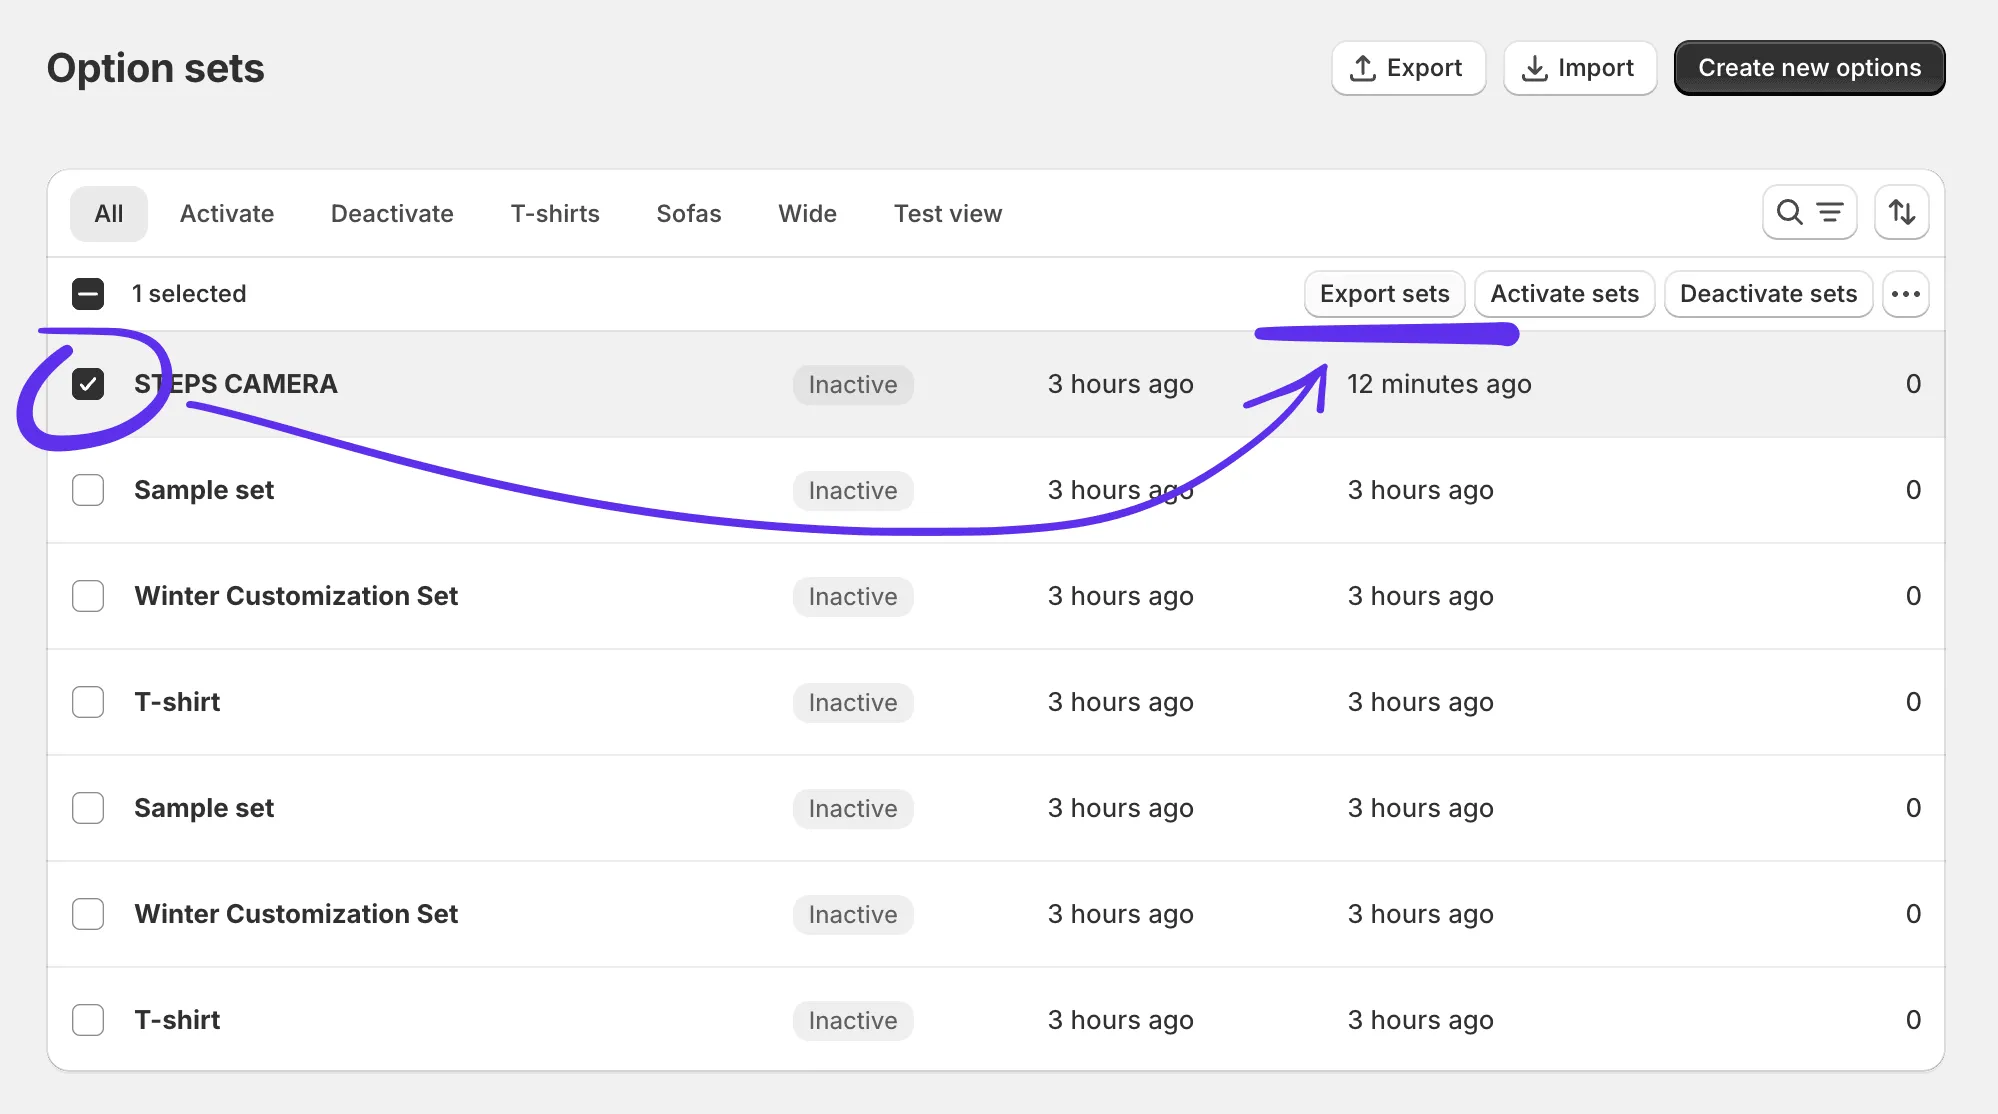
Select the option sets you want to update and click Export sets to generate a CSV file with existing IDs.
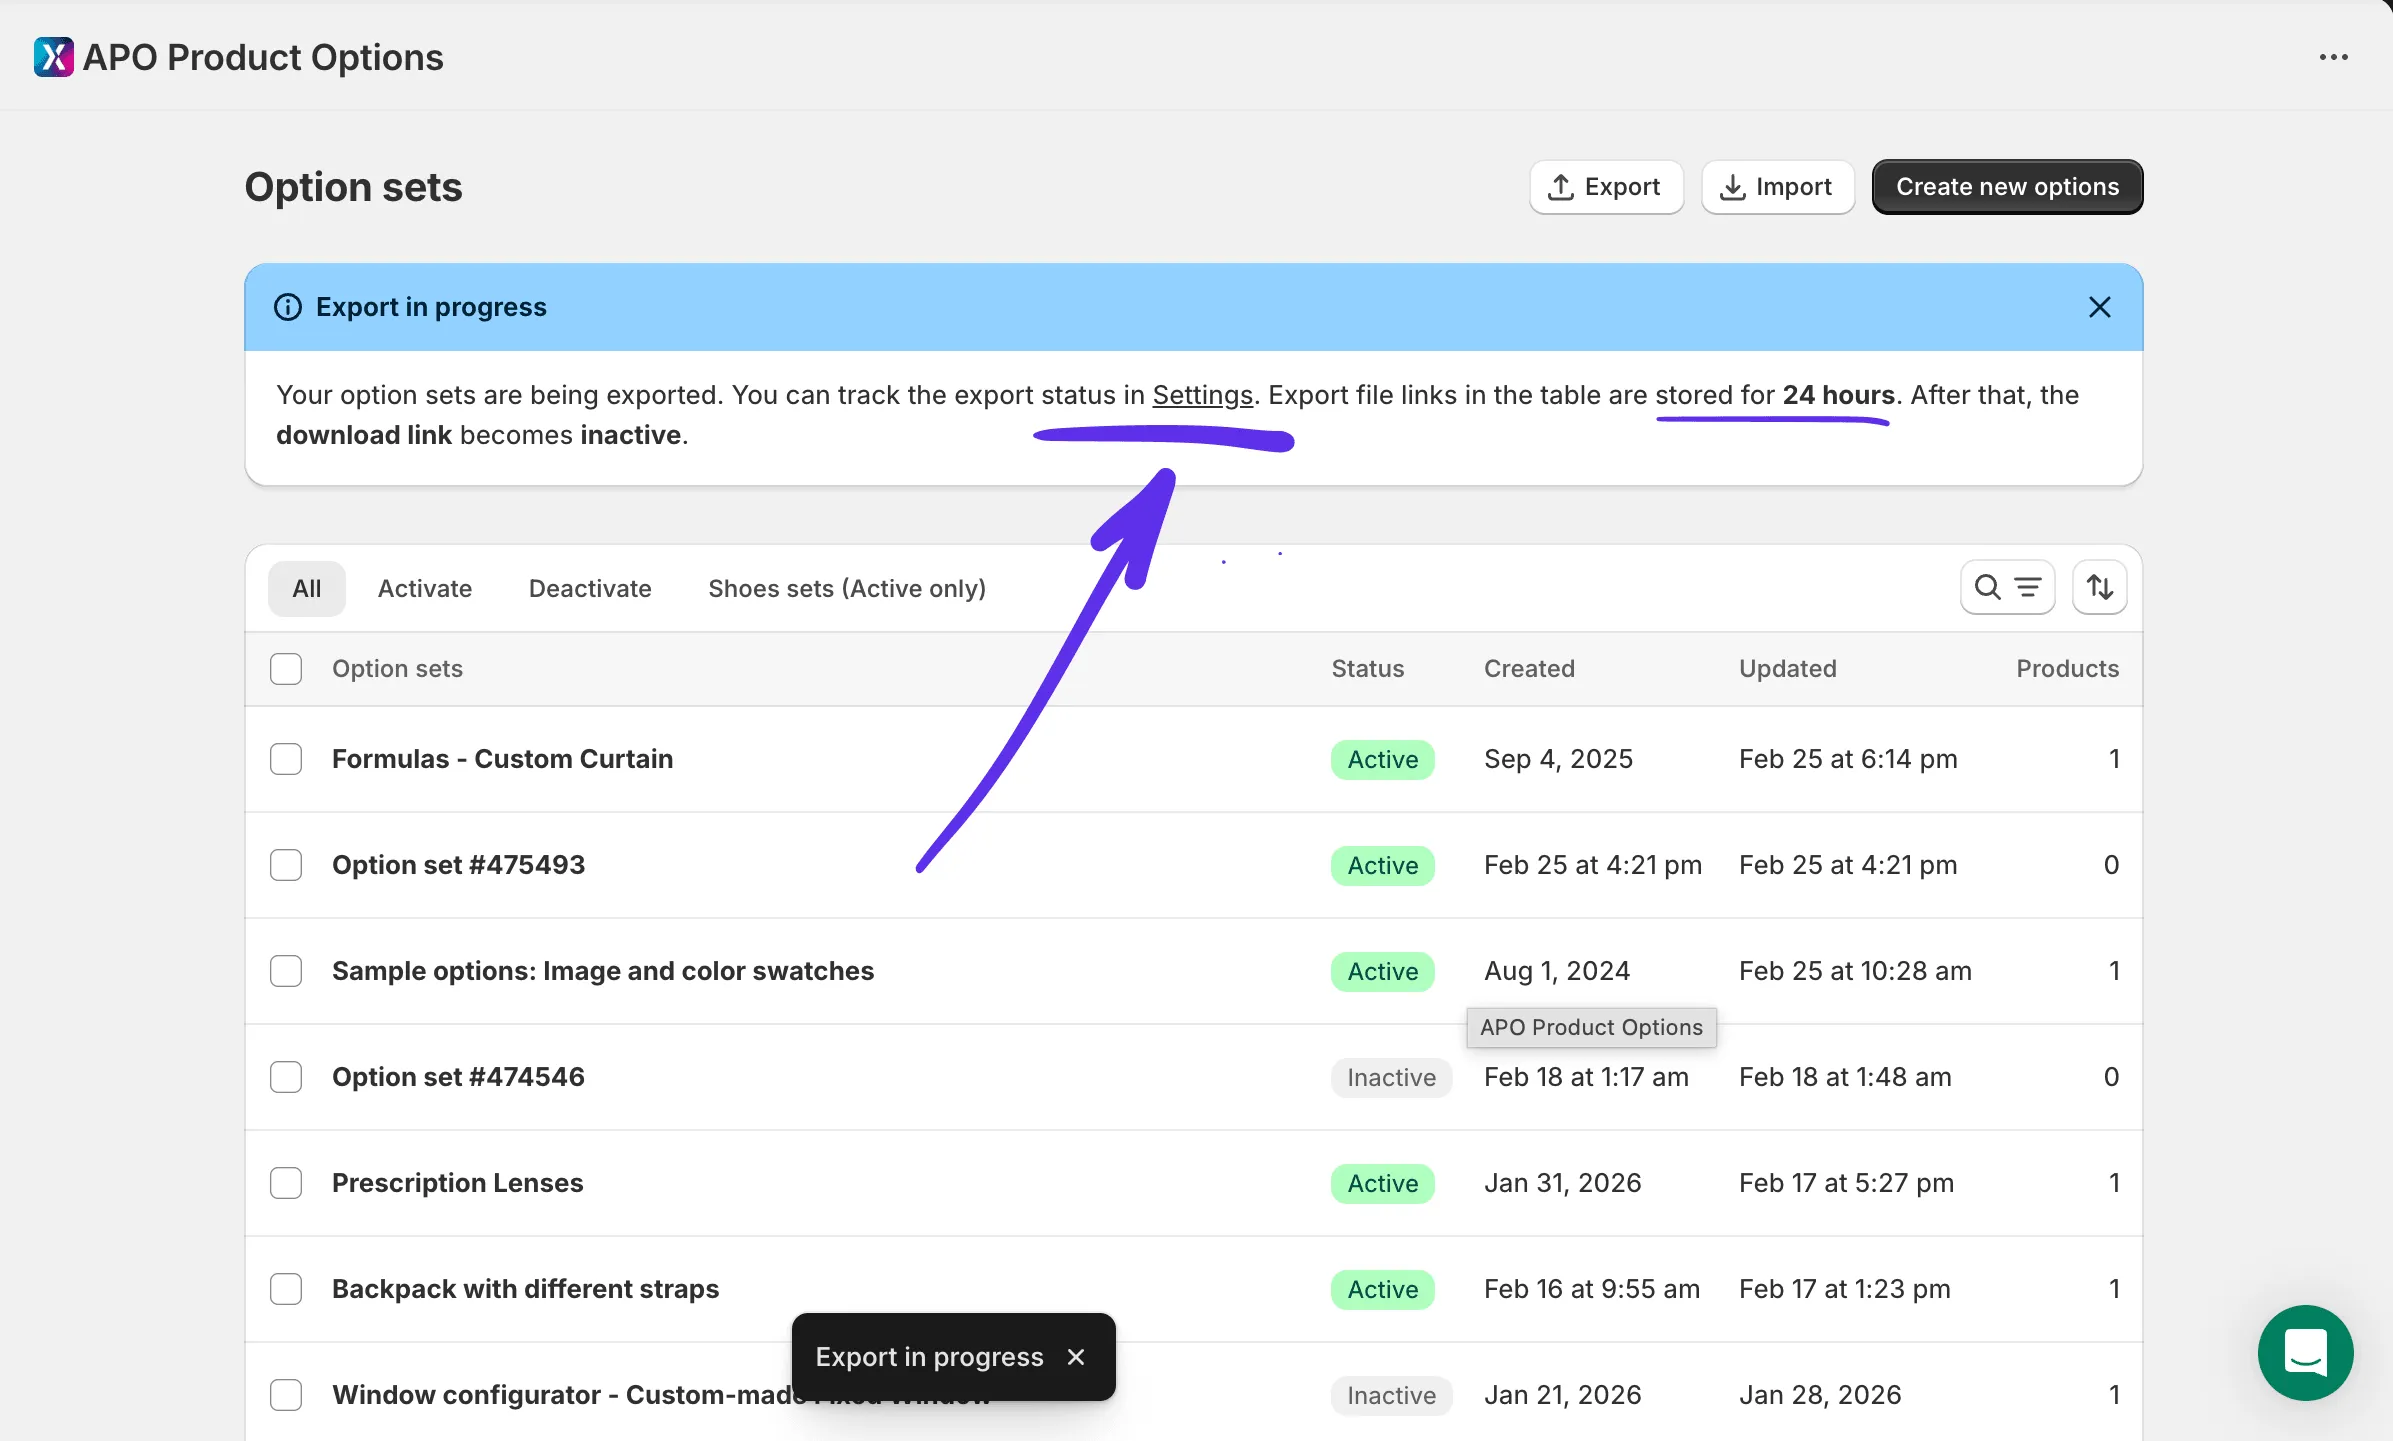
Go to Settings → Import & Export to track the export status and download the file when it is ready.
Import and export statuses are not updated automatically. Click Refresh to see the latest status. Once the export is finished, download the CSV file from the File / Report column.
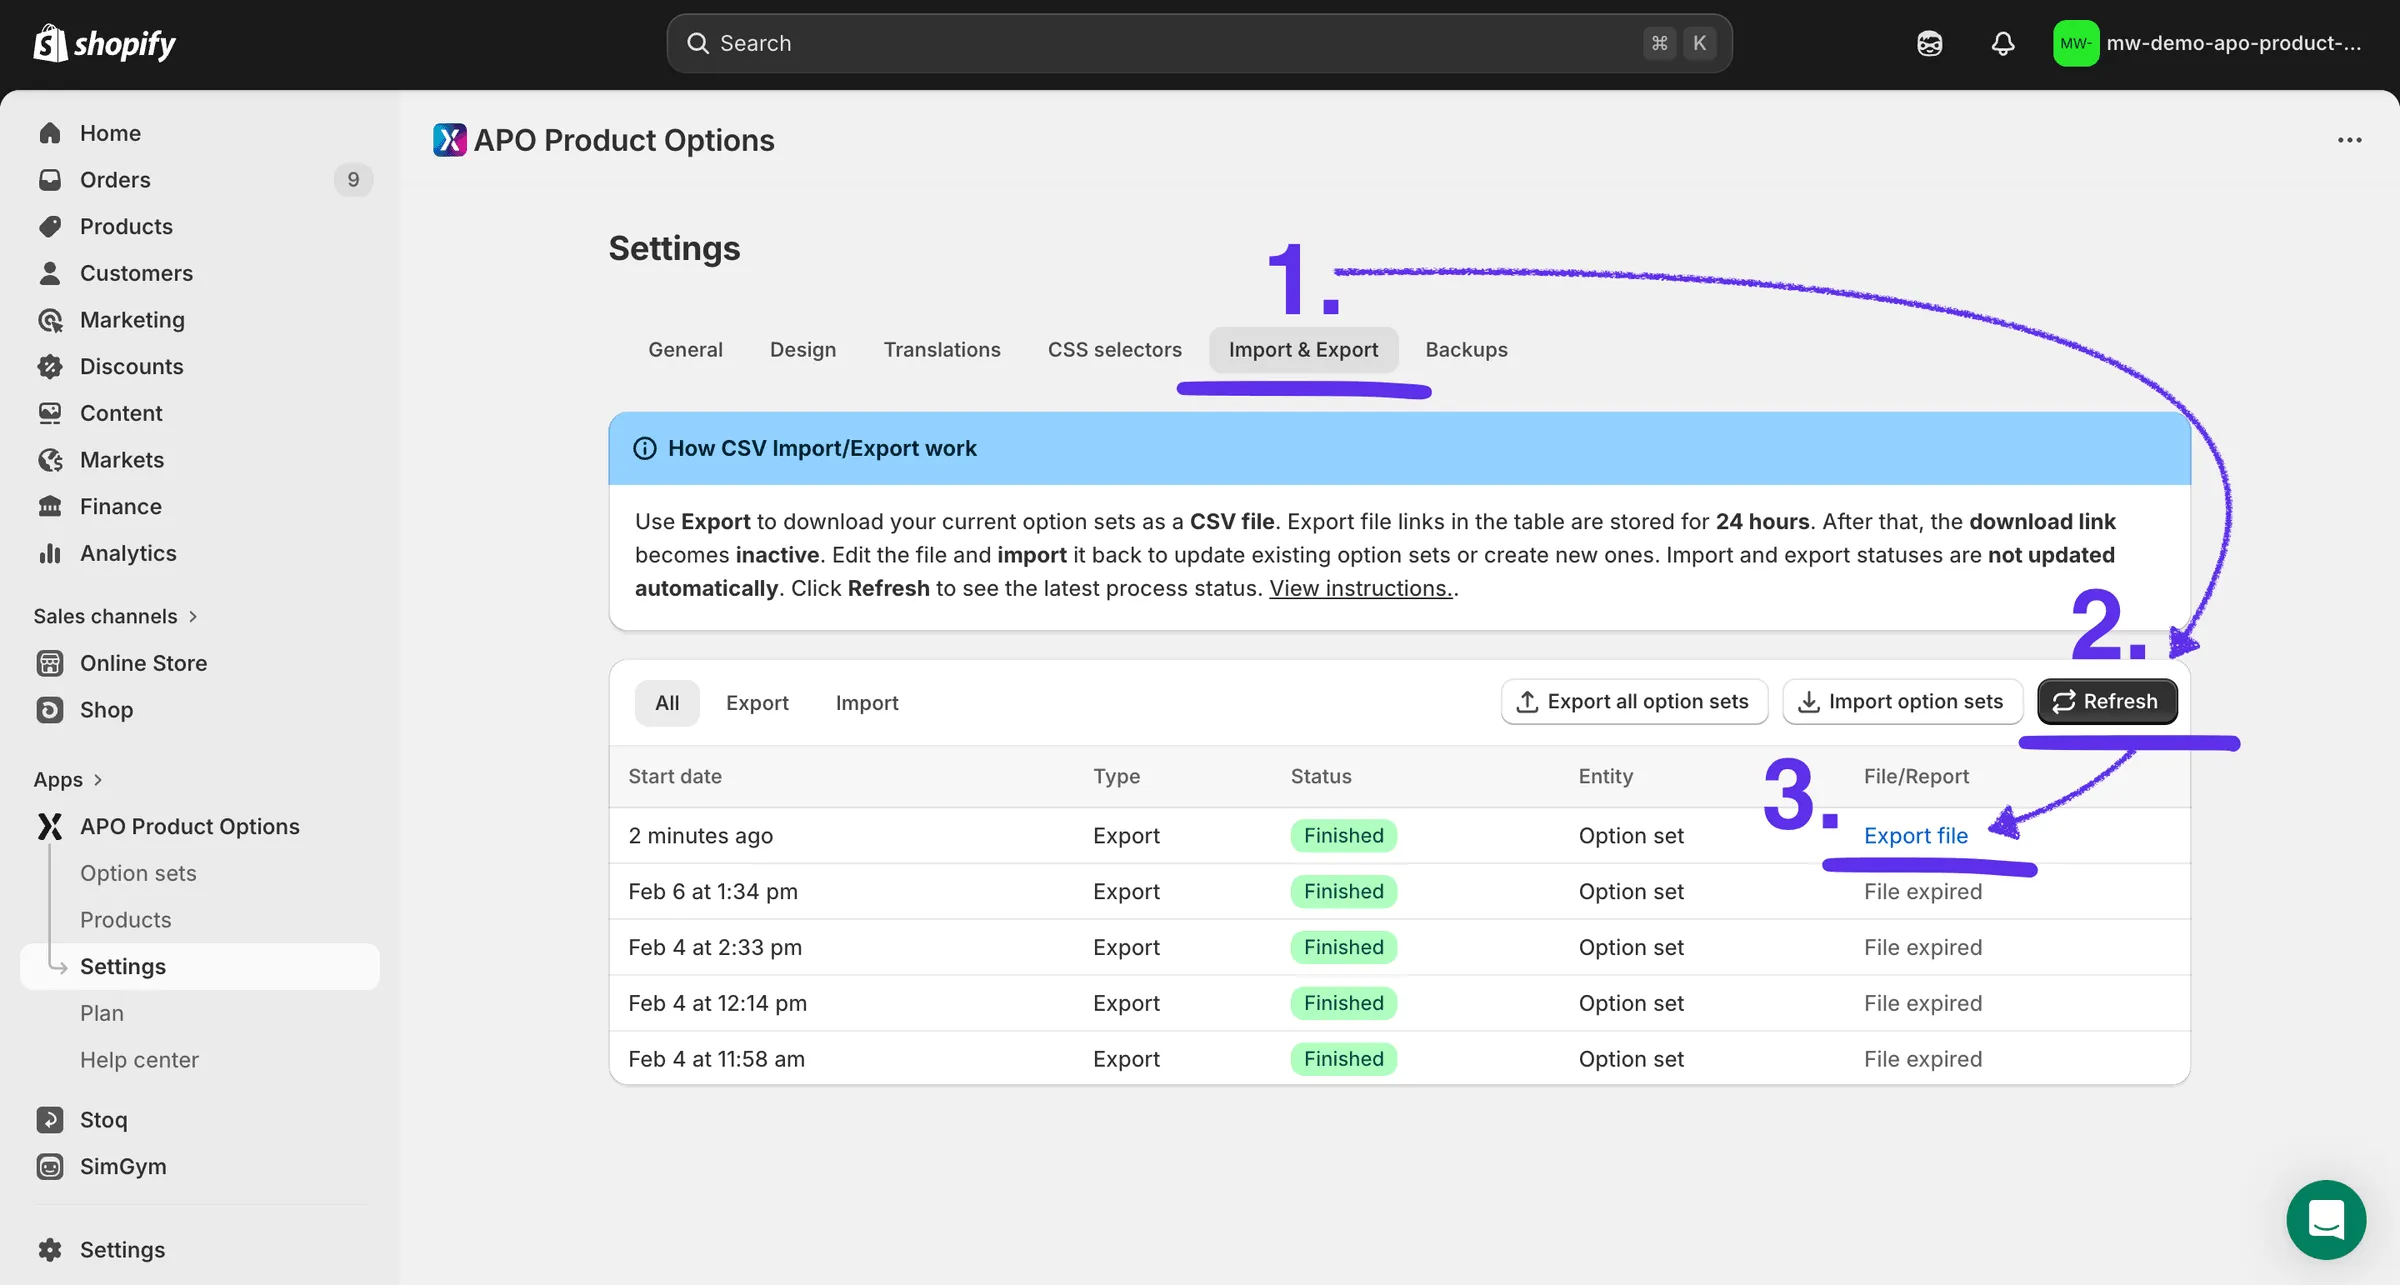
This generates a CSV file that already contains all required IDs.
Step 2: Edit the exported CSV file
Section titled “Step 2: Edit the exported CSV file”How rows must be structured
Section titled “How rows must be structured”Each row can describe only one level: a set, an option, or a value. Because of this, some cells must always stay empty. If a row contains data in cells from multiple levels, the import will fail. Row order defines hierarchy: values go under options, options go under sets.
- If you are creating a set row: option and value columns must be empty.
- If you are creating an option row: set and value columns must be empty.
- If you are creating a value row: set and option columns must be empty.
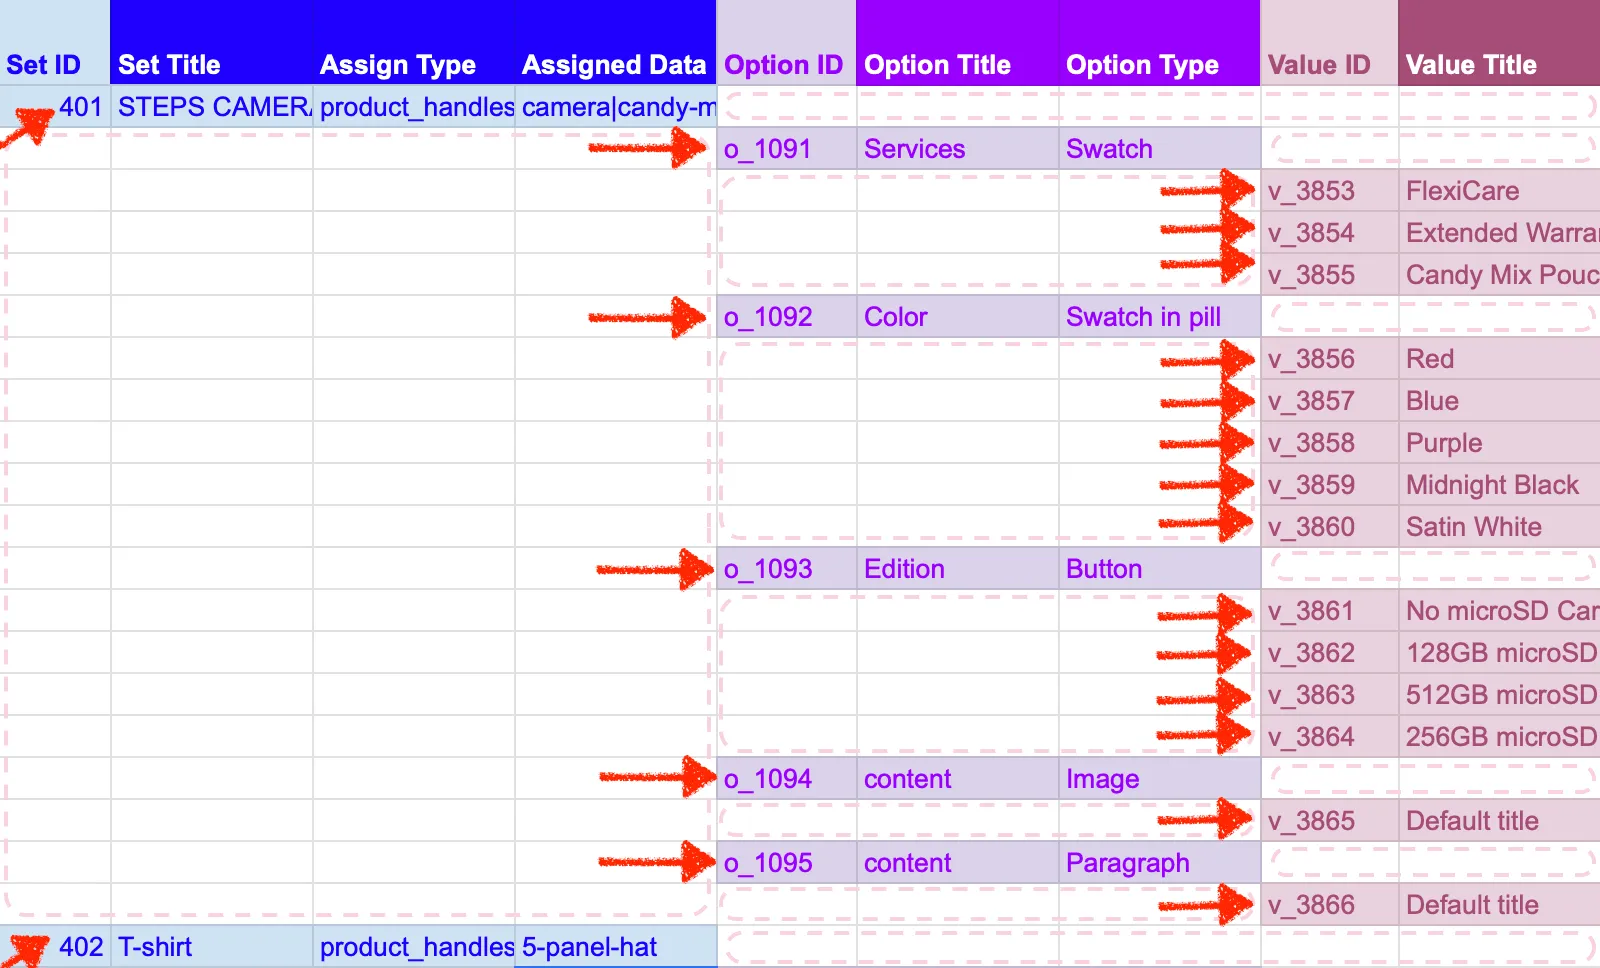
How to remove options or values
Section titled “How to remove options or values”- To delete a value → remove its row
- To delete an option → remove the option row and all its values
- Do not leave an option without values
If this rule is violated, the import will not be applied.
Important rule about deleting values
Section titled “Important rule about deleting values”An option cannot exist without values. If an option has only one value, you cannot delete just that value. In this case, you must delete the entire option, including its option row and all related value rows.
Deleting the last remaining value while keeping the option will cause the import to fail.
| Column | What to enter | Allowed / example values |
|---|---|---|
| Set ID | Leave empty when creating a new option set. Keep the existing value when updating a set. | Auto-generated ID from export, for example: 401 |
| Set Title | The name of the option set. This is required. Must not be empty. | Any text, for example: Camera options Winter customization Extras for T-shirt |
| Set Status | Turn the option set on or off | 1 = active, 0 = inactive (Default) |
| Assign Type | How to assign the set to products | product_handles or conditions |
| Assigned Data | product_handles or conditions | product_handles: 5-panel-hat When assigning a set to multiple products by handle, list the handles in one cell separated by a vertical bar: product_handles: camera\ |
| Option ID | Leave empty when creating a new option. Keep the existing value when updating an option. | Existed Option ID from export, for example: o_812 |
| Option Title | The option name shown to customers. Required for all option types, including content options. Must not be empty. | Any text, for example: Color Size Extras |
| Option Help Text | Optional helper text shown under the option on the storefront. | Any text, for example: Choose one option Leave empty if not needed. |
| Option Type | The option input type. Required. Enter the option type exactly as shown in the UI. If the option type does not match exactly, the import will fail. | Swatch Swatch in pill Swatch card Swatch in dropdown Wide image card Button Tile Dropdown Radio button Multi-select swatch Multi-select swatch in pill Multi-select swatch card Multi-select wide image card Multi-select button Multi-select tile Checkbox Text box Multi-line text box Number field Step counter Range slider Date picker File upload Heading Paragraph Image Divider Spacer Modal HTML-block |
| Option Is Required | Is the option mandatory | 1 = yes, 0 = no |
| Option Sort | The order of the option inside the option set. | Positive number, for example: 1, 2, 10 Lower number = higher position. Leave empty (or 0) to keep the current order. |
| CSS Class | Optional custom CSS class for the option. | [“a”,“b”] Leave empty if not used. |
| Value ID | Leave empty when creating a new value. Keep the existing value when updating a value. | Existed Value ID from export, for example: v_3104 |
| Value Title | The value name shown to customers. Required for all values, including input and content options. | Any text, for example: Red Large Default value |
| Value Help Text | Optional helper text shown next to or under the value on the storefront. | Any text, for example: Most popular choice Leave empty if not needed. |
| Value Badge | A badge label displayed next to the value. | Example (preset text badge): {“color”:“#D72C0D”,“key”:“hot”,“text”:“HOT”,“type”:“text”,“uid”:null} Paste the object exactly as shown Custom badges require a valid uid. At the moment, new uid values cannot be generated during CSV import. This means: 1. You can reuse an existing custom badge by keeping its uid 2. You cannot create a brand-new custom badge via CSV import {“color”:“#FFB800”,“key”:“custom_text”,“text”:“Custom Badge”,“type”:“text”,“uid”:“dox2agxr6rzc”} If you need to create new custom badges via import, please contact our support team. |
| Value Images / Colors | Image or color for the value | Single color swatch: color:#44215E, is_visible:1 Double color swatch: first_color:#EAE4DB, second_color:#2A2828, is_visible:1 Image URLs must be direct, publicly accessible links hosted on a server. During import, images are copied and stored on the APO server. Single image: url:https://example.com/image.png, is_visible:1 Multiple images: url:https://example.com/image1.png, is_visible:1 \ |
| Value Status | Controls how the value behaves on the storefront. | active The value is visible and can be selected. unavailable (only for select-type options) The value is visible but cannot be selected. archived (only for select-type options) The value is hidden and not displayed on the product page. Not applicable to input or content options. |
| Value Is Default | Marks the value as selected by default. | Allowed / example values 1 = default value 0 = not default Important: Only one value per option can be set as default (except multiple selection option types). |
| Value Sort | Controls the order of values inside the option. | Positive number, for example: 1, 2, 10 Lower number = higher position. Leave empty (or 0) to keep the current order. |
| Pricing Type | How the price is calculated | fixed or percent |
| Price Value | Price amount | 10, -5, 7.5 |
| Compare-at Price | Compare-at price | 15, 0 |
| Pricing Is One-Time | One-time price | 1 = yes, 0 = no |
| Addon Link Type | How the add-on product is linked to the option value. | handle — link by product handle variant_id — link by specific product variant ID |
| Addon Link | The identifier of the add-on product. Must match the selected Add-on Link Type. | When Add-on Link Type = handle: product_1 When Add-on Link Type = variant_id: 45318880297175 |
| Use Addon Image | Whether to use the add-on product image as the option value image. | 1 = yes, 0 = no |
| Hover Addon Image | Whether to enlarge the add-on product image on hover. Works only if Use Add-on Image = 1. | 1 = yes, 0 = no |
| Inventory Is Enabled | Enable value quantity limit | 1 = enabled, 0 = disabled |
| Value SKU | SKU for the value | SKU-RED-01 |
| Is Physical Product | Is the value physical | 1 = physical, 0 = digital |
| Value Weight | Weight amount | 0.5, 250 |
| Value Weight Unit | Weight unit | g, kg, lb, oz |

Need more data in the export?
Section titled “Need more data in the export?”CSV export includes only structured option set data. If you need to export additional data such as option elements, rules, or other internal settings, contact our support team.
On request, we can provide a Full Export that includes extended configuration data.
Step 3: Import the CSV
Section titled “Step 3: Import the CSV”Start the import
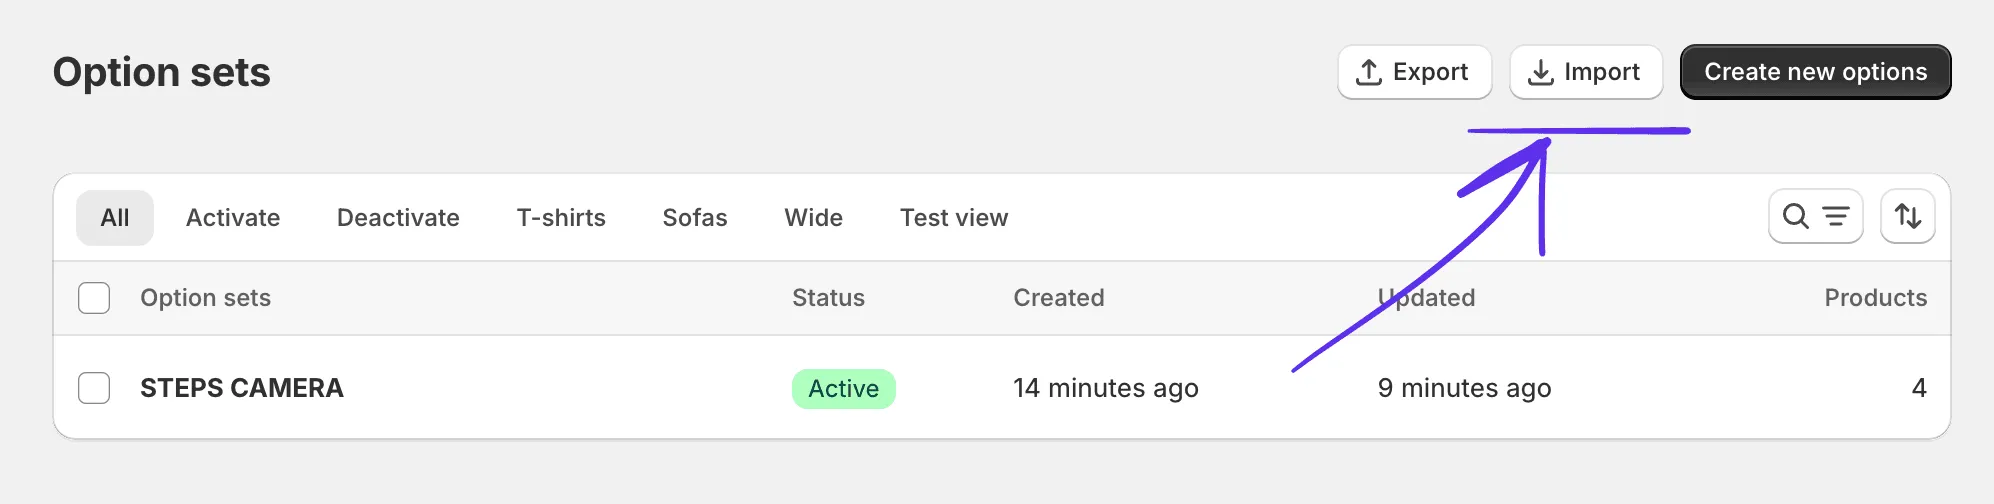
Section titled “Start the import”Click Import in the Option Sets list to upload your edited CSV file.
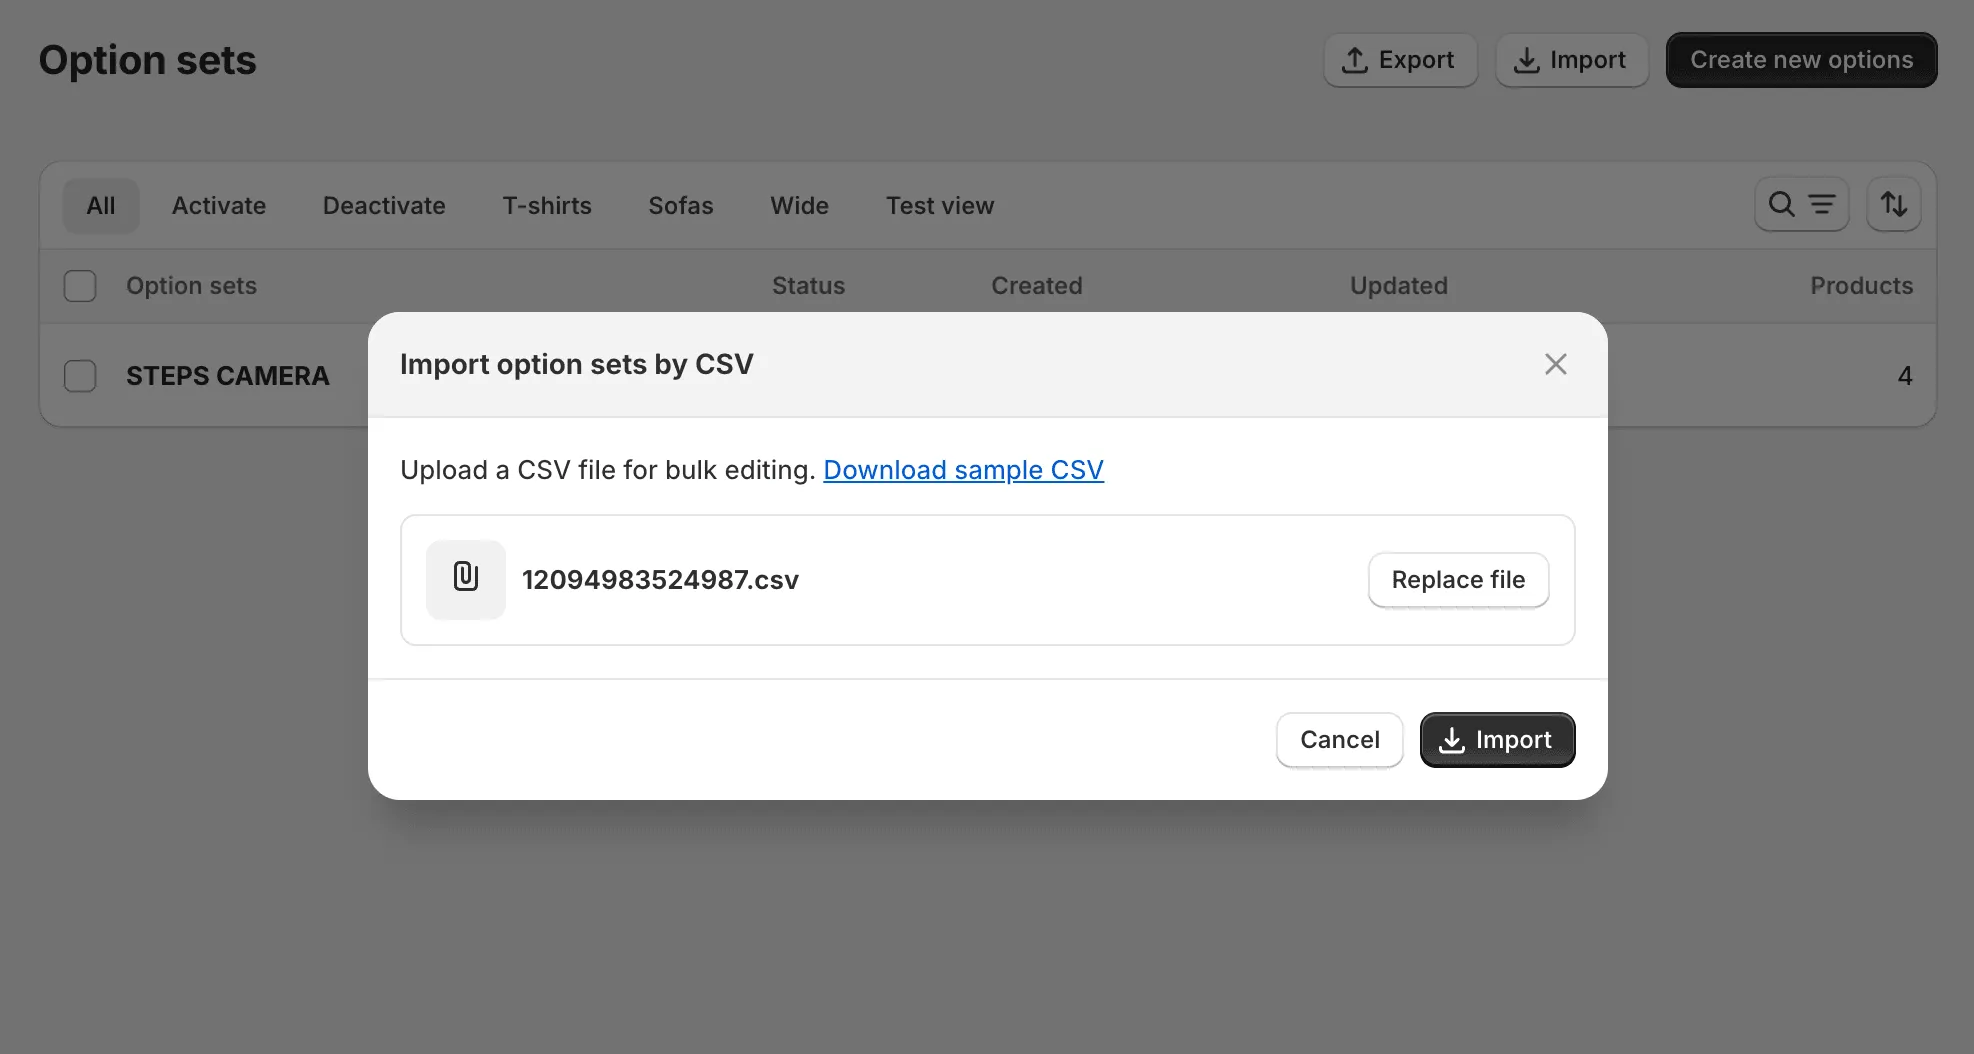
This opens the CSV import modal. Select your edited CSV file and click Import.
Import runs in the background
Section titled “Import runs in the background”After starting the import, it runs asynchronously. You can continue working in the admin.
Track import status
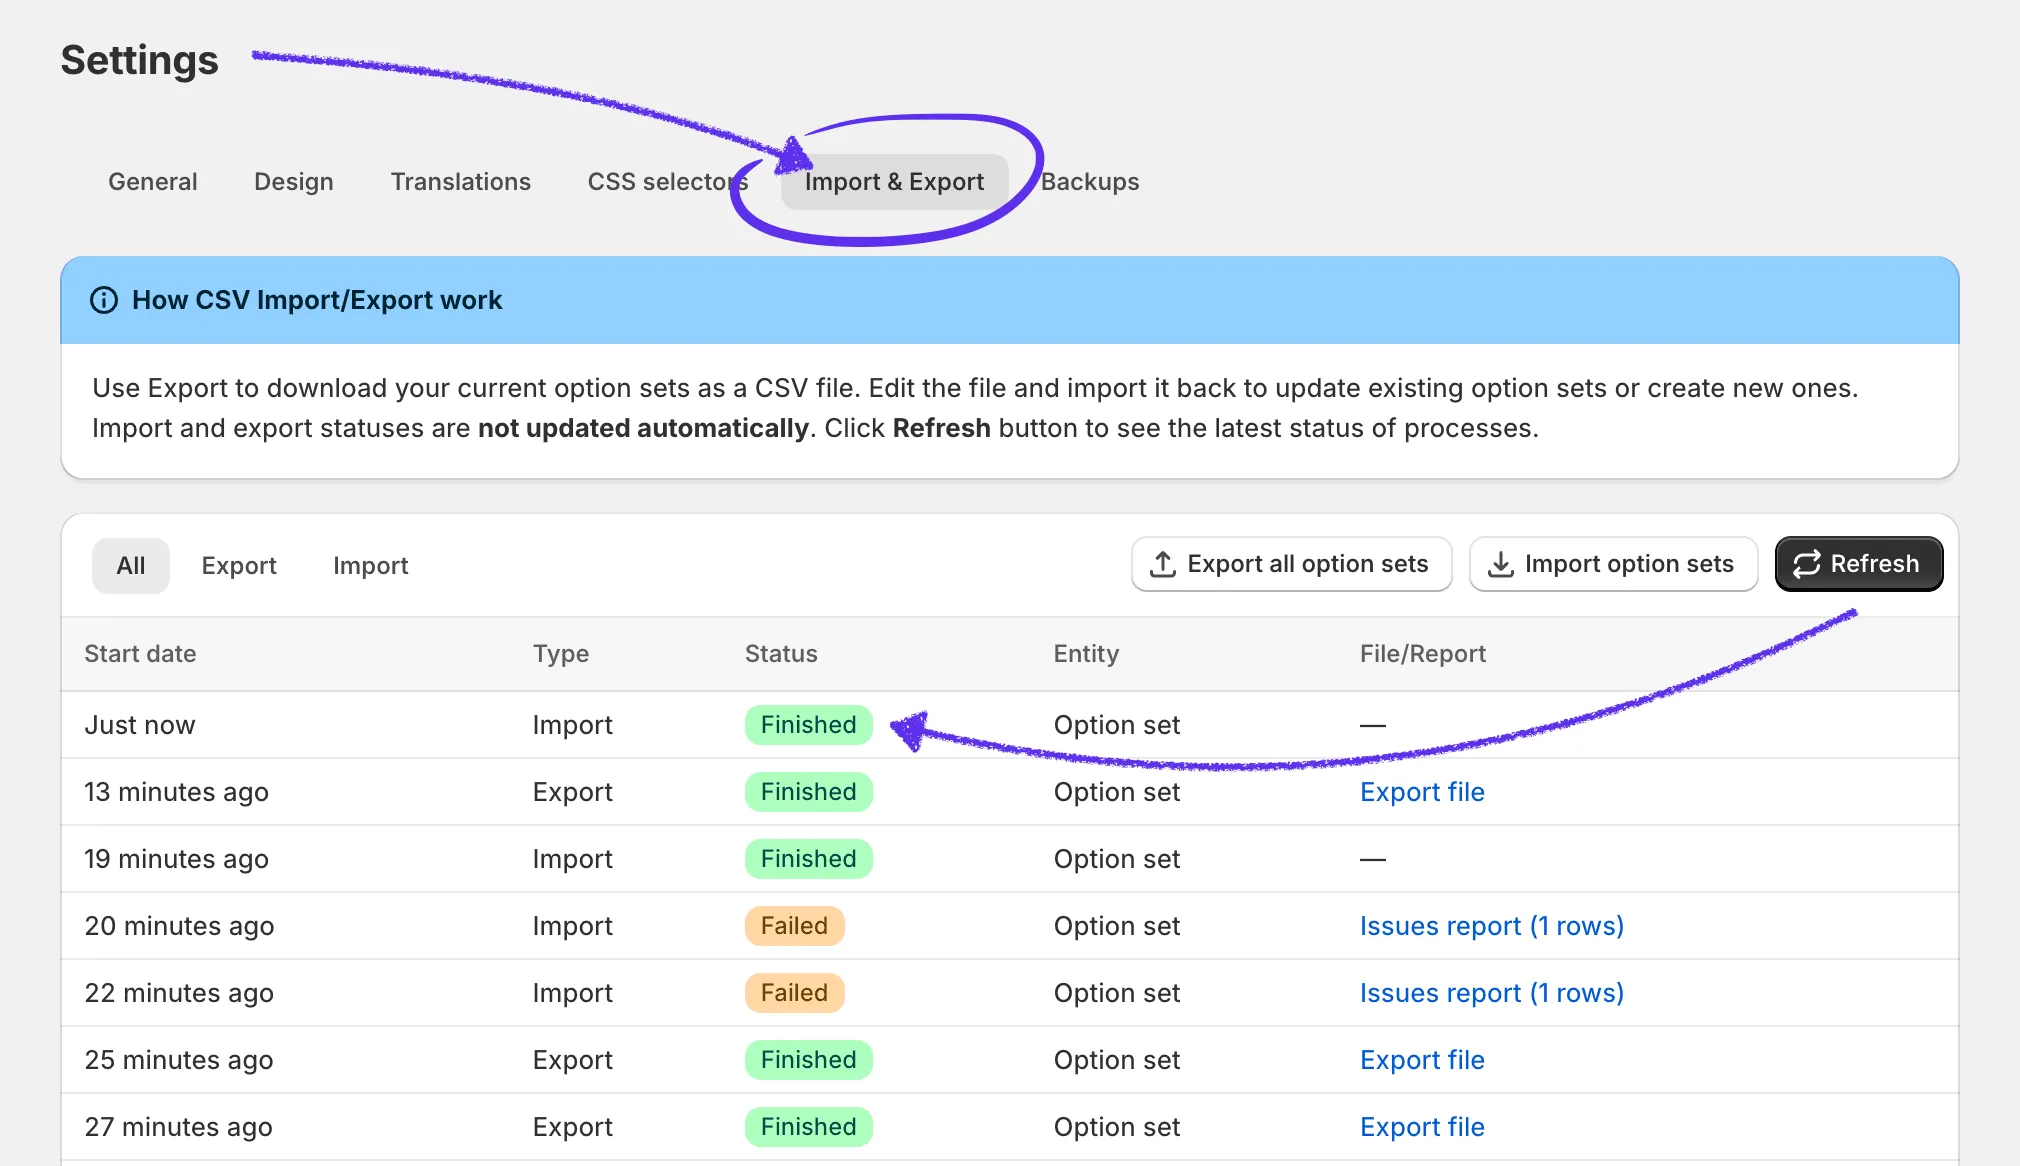
Section titled “Track import status”Go to Settings → Import & Export to see the import progress and result.
Import and export statuses are not updated automatically.
Click Refresh to see the latest status.
Import results
Section titled “Import results”Possible outcomes:
- Finished - Import completed successfully and changes are applied.
- Failed - Import was not applied. An Issues report is available. Click Issues report to download the file, fix the errors, and re-import. If the import fails: nothing is partially saved, existing option sets remain unchanged. Safely fix the CSV and try again, or restore a backup if needed.